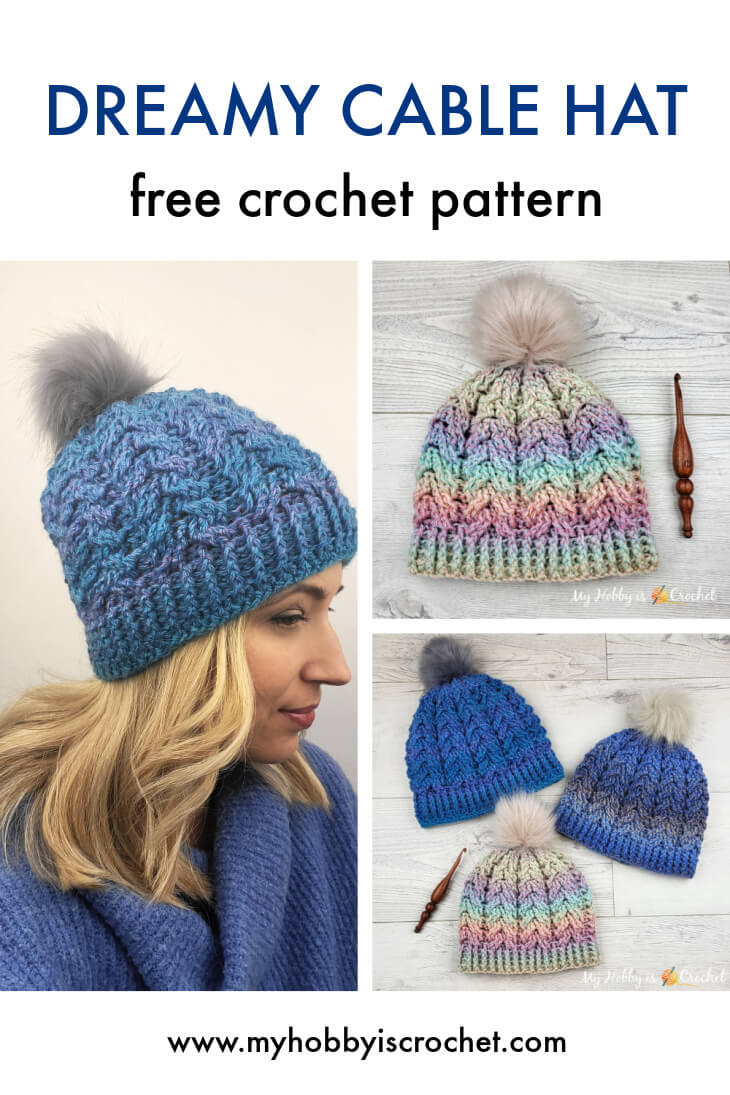
Dreamy Cable Hat | Free Crochet Pattern
The Dreamy Cable Crochet Hat is a cozy, textured beanie with beautiful cable stitches that are easier than they look. This free crochet pattern includes a step-by-step picture tutorial, making it perfect for learning crochet cables with confidence.
📌 Save this crochet pattern on Pinterest
💙 Add this pattern to your Ravelry favorites & queue
Want a printer-friendly version? You’ll find a green Print Friendly button at the end of the pattern.
*Disclaimer: This post includes affiliate links and at no additional cost to you, I might earn a small commission if you decide to purchase through these links. Thank you!
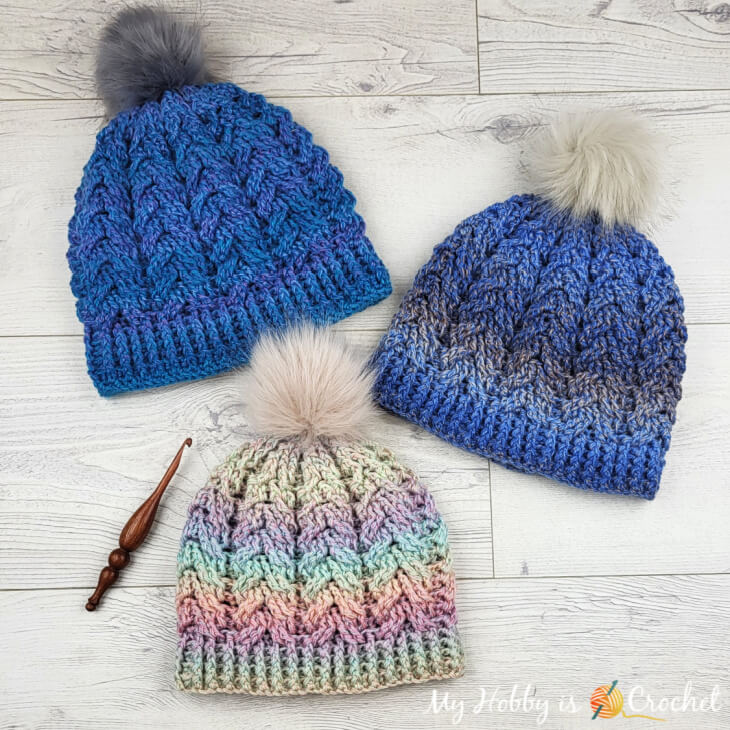
To make these hats I have used wool yarn from Hobbii, called Dream Colour Yarn, that has very beautiful slow color transitions.
I love the "Unicorn"colorway!! The child size hat made with Dream Colour "Unicorn" yarn turned out super cute!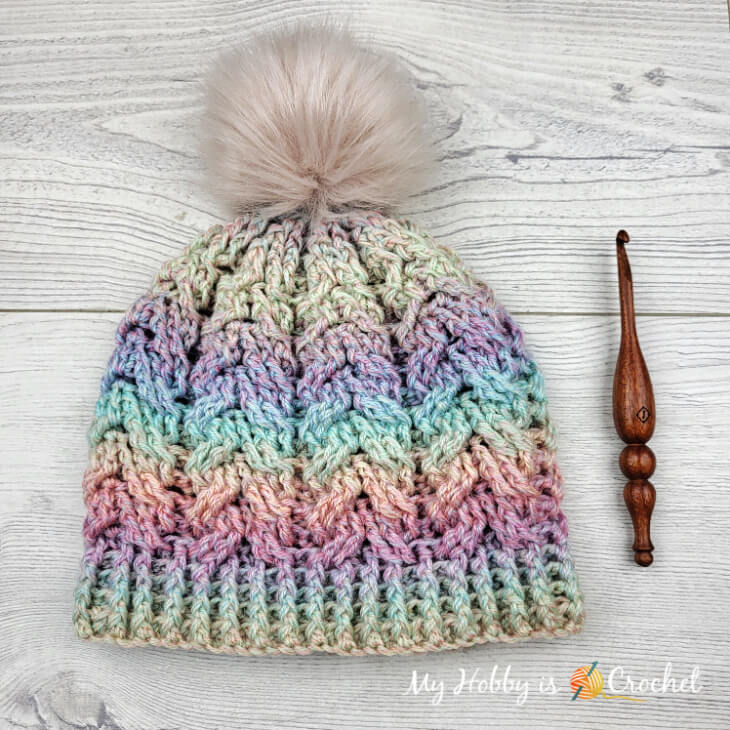
Because the yarn is very thin, a Fingering, Sock yarn, I have crocheted with two yarn strands held together, basically using 2 skeins at the same time. That’s why I have also used a bigger hook size, two times thicker as the recommended hook size written on the yarn label.
If you are allergic to wool yarn, you can replace it with the yarn of your choice, making sure to meet the gauge indicated in the pattern.
Hat Construction
The Hat is worked as one piece from the bottom up in joined rounds, starting with the ribbing, continuing with the hat body, then the top of the hat will be shaped with a few decrease rounds. Finally the stitches on the top edge will be cinched together to close the hole.Gauge
Gauge for the ribbing using a 5 mm crochet hook: 19 sts = 4" (10cm) in rib pattern stitch: *1 bpdc, 1 fpdc* repeatGauge for cable pattern using a 6 mm crochet hook: 2 cable repeats = 18 sts and 10 rounds = 4" x 4" (10cm x 10cm)
The cables are made with a 2 rounds repeat stitch pattern; the multiple for the stitch pattern is 9!
SIZES:
This hat pattern comes in 2 sizes: child and teen/ adult women.Child 6-10 years : hat height: 7.87” (20 cm), hat circumference 19”
Teen/Adult Women: hat height 8.66” (22 cm), hat circumference 21”
How to change/adjust hat sizes
The easiest way to change the size of the hat is to use another yarn and hook size(s)!I like my hats to have a snug fit, if you prefer them a bit looser on the head, go up with the hook sizes: for the ribbing use a 5.5 mm hook and for the rest of the hat use a 6.5 mm hook. (You might need to adjust the height of the hat!)
You can obtain other sizes by altering the pattern as suggested below:
To change hat circumference, add/subtract sts to start with; the total number of stitches for the ribbing should be a multiple of 2!
For the cable pattern the multiple is 9; so you would need to adjust the number of the stitches of the first round with cables, so that you get a total number of stitches that is a multiple of 9.
To change hat height you can either make more rounds for the ribbing, or make more/ less cable rounds before starting to decrease the top.
SUPPLIES:
THE YARN:
You will need 2 skeins of Dream Colour Wool yarn from Hobbii.You will crochet with both skeins at once, holding the 2 yarn strands together.
You will use approx. half of each skein.
Yarn Weight: 100 g (3.5 oz) per skein
Yarn Length: 400 m (437 yds)
Yarn Weight: Fingering, Sock
For my hats I have used 2 skeins of the following colorways:
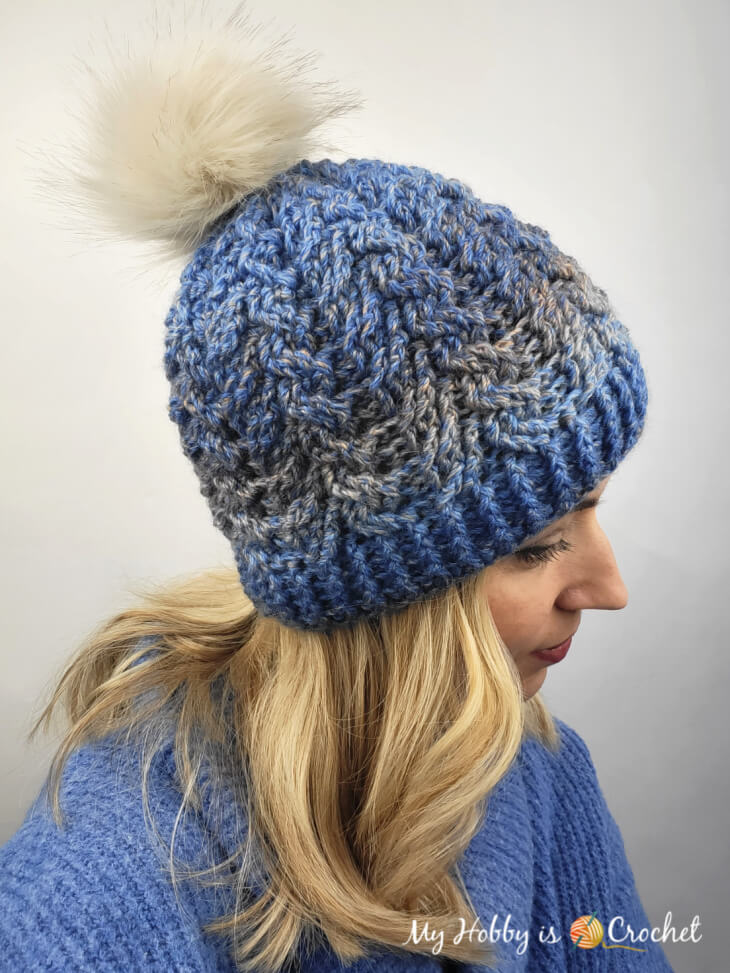
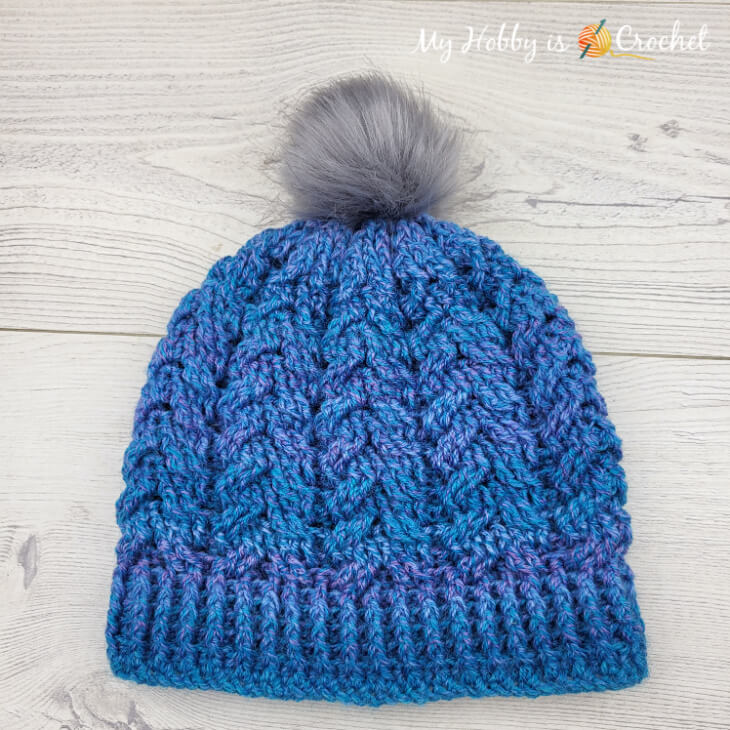
Dream Colour Unicorn (09); Dream Colour Province (21) and Dream Colour Sandy Costline (12)
Other supplies:
- 5 mm crochet hook (for the ribbing)
- 6 mm crochet hook; (I have used a Furls wooden hook from the Alpha Series) (for the body and the top of the hat)
- Tapestry needle
- Scissors
- stitch markers or yarn pieces (for child size 8 stitch markers, for adult size 9)
- Faux Fur Pompom
Stiches, Terms (USA terms) and Abbreviations
- ch: chain- st: stitch
- dc:double crochet
- sk: skip - fpdc = front post double crochet: Yo, insert your hook from front to back to front around the post of the next stitch, yo, pull up a loop, yo, pull thru 2 loops on your hook, yo, pull thru remaining two loops on your hook.
- bpdc = back post double crochet: Yo, insert your hook from back to front to back around the post of the next stitch, yo, pull up a loop, yo, pull thru 2 loops on your hook, yo, pull thru remaining two loops on your hook.
- fptr = front post triple crochet: Yo 2 times, insert hook from front to back to front around the post of the next stitch, yo, pull up a loop, (yo, pull thru 2 loops on your hook) 3 times.
- fpdc-dec = Front post double crochet DECREASE: Yo, insert your hook from front to back to front around the post of both next 2 sts at the same time, yo, pull up a loop, yo, pull thru 2 loops on your hook, yo, pull thru remaining two loops on your hook.
→ See my Video Tutorial!
- fptr-dec= Front post triple crochet DECREASE: Yo 2 times, insert your hook from front to back to front around the post of both next 2 sts at the same time, yo, pull up a loop, (yo, pull thru 2 loops on your hook) 3 times.
So, to (invisible) decrease the front post double and treble crochet stitches, you will insert the hook around the post of the next 2 indicated stitches and you will continue to complete one fpdc or one fptr as usual. See picture below!

Special Stitch:
Cable: sk next 2 sts, work 1 dc in each of next 2 sts; work 1 fptr around each of the 2 skipped sts going in front of the 2 dc just made; Sk next 2 sts, work 1 fptr around each of next 2 sts; work 1 dc back into each of the 2 skipped sts going behind of the 2 fptr just made1 Cable will be worked across 8 sts!
Notes:
- The ch1 and ch2 at beg of rounds will not count as a st.
- At the end of each round you will slst into the first back post dc st st the beg of the round and not into the ch2.
HAT INSTRUCTIONS
The instructions are written for the child size with changes for the adult women size in the parentheses.The Ribbing
With hook size 5 mm, chain 72 sts (80 sts). Being careful not to twist the chains, join with slst to first ch.
Round 1: ch1, work 1 hdc in each st around, join with slst to top of first hdc. Total 72 sts (80 sts)
Note: The first round I have worked into the back bump behind the chains. It's a bit trickier, but it gives a pretty edge.If you prefer, you can start directly with a row of chainless foundation hdc, then join into round with slst to top of first st. And continued with round 2 below!
Round 2: ch2, work “1bpdc around next hdc, 1 fpdc around next hdc”; repeat from * to * around. Total 72 sts (80 sts)
Rounds 3 - 6: ch2, work “1bpdc around next bpdc, 1 fpdc around next fpdc”; repeat from * to * around.
Total 72 sts (80 sts)
Do not cut yarn! You will continue after the next step with the cable pattern!
Adding stitch markers to last round of the ribbing; preparing for the first cable round!
Take the 8 (9) stitch markers. Insert the first st marker around the post of the first st of the last ribbing round (that's the first bpdc of the round!).Count 9 stitches from the previous stitch marker and insert the next stitch marker around the post of the 9.st.
Repeat this around, so that in between each 2 stitch markers there are 8 stitches.
(See the picture below!) (For the final repeat of the adult size you will have only 7 stitches in between the last and the first marker at the beginning of the round; this is where you will have to adjust the pattern when working the next round with cables!)
Around the markered stitches you will work the next round 1 bpdc and in between the stitch markers you will work the cable across the 8 sts.

Begin Cable Pattern!
Change to hook size 6 mm!!! From now on you will work all the next rounds with the 6 mm hook!For the adult size you will need an extra stitch from 80 to 81 sts total, so that is a multiple of 9! Add it at the last cable repeat.
Round 1: ch2, *work 1 bpdc around next (marked) st,
sk next 2 sts, work 1 dc in each of next 2 sts;
work 1 fptr around each of the 2 skipped sts going in front of the 2 dc just made;
Sk next 2 sts, work 1 fptr around each of next 2 sts;
work 1 dc back into each of the 2 skipped sts going behind the 2 fptr just made*;
Repeat from * to * around, join with slst to top of the first bpdc.
Total 72 sts (81 sts).

You will get 8 cables for the child size and 9 cables for the adult size.
Round 2: ch 2, *work 1 bpdc around next bpdc, 1 fpdc around each 8 sts of the next cable*;
repeat from * to * around, join with slst to top of the first bpdc.
Total 72 sts (81 sts)

Rounds 3 - 10 (12): repeat as rounds 1-2 of the cable pattern 5 times (6 times).
Here is how the it should look like after finishing round 12 for the adult size, before starting the decrease round for top shaping. (The hat height is now approx. 6 inches!):
Begin Crown Shaping with Decrease rounds!
Round 1 (decrease each cable from 8 to 6 sts!):
Ch 2, *work 1 bpdc around next bpdc,
sk next 2 fpdc, work 1 dc in each of next 2 fpdc;
going in front of the 2 dc just made,
work 1 fptr-dec inserting hook around both 2 skipped sts at the same time;
Sk next 2 fpdc, work 1 fptr-dec inserting hook around both next 2 fpdc at the same time;
going behind the fptr-dec just made, work 1 dc back into each of the 2 skipped sts*;
Repeat from * to * around, join with slst to top of the first bpdc.
Total 56 sts ( 63 sts).
You have decreased 16 sts for the child size and 18 sts for the adult size!
Round 2: ch 2, *work 1 bpdc around next bpdc, 1 fpdc around each 6 sts of the next cable*;
repeat from * to * around, join with slst to top of the first bpdc.
Total 56 sts (63 sts)
Round 3 (decrease each cable from 6 to 4 sts!):
Ch 2, *work 1 bpdc around next bpdc (the marked st)
sk next 2 fpdc, work 1 dc in next fpdc;
going in front of the dc just made,
work 1 fptr-dec inserting hook around both 2 skipped sts at the same time;
Sk next fpdc, work 1 fptr-dec inserting hook around both next 2 fpdc at the same time;
going behind the fptr-dec just made, work 1 dc back into the skipped st*;
Repeat from * to * around, join with slst to top of the first bpdc.
Total 40 sts ( 45 sts).
You have decreased 16 sts for the child size and 18 sts for the adult size!
Round 4: ch 2, *work 1 bpdc around next bpdc, 1 fpdc around each 4 sts of the next cable*;
repeat from * to * around, join with slst to top of the first bpdc.
Total 40 sts (45 sts)
Round 5: (Decrease the fpdc sts in between the bpdc sts from 4 to 3):
ch 2, *work 1 bpdc around next bpdc, 1 fpdc around each of next 2 fpdc,
1 fpdc-dec inserting hook around both next 2 sts at the same time*;
repeat from * to * around, join with slst to top of the first bpdc.
Total 32 sts (36 sts).
You have decreased 8 sts for the child size and 9 sts for the adult size!
Round 6: (Decrease the fpdc sts in between the bpdc sts from 3 to 2):
ch 2, *work 1 bpdc around next bpdc, 1 fpdc around next fpdc, 1 fpdc-dec inserting hook around both next 2 sts at the same time*;
repeat from * to * around, join with slst to top of the first bpdc.
Total 24 sts (27 sts).
You have decreased 8 sts for the child size and 9 sts for the adult size!
Round 7: (Decrease the fpdc sts in between the bpdc sts from 2 to 1):
ch 2, *work 1 bpdc around next bpdc, 1 fpdc-dec inserting hook around both next 2 fpdc at the same time*;
repeat from * to * around, join with slst to top of the first bpdc.
Total 16 sts (18 sts).
You have decreased 8 sts for the child size and 9 sts for the adult size!
Cut yarn leaving a long tail that will be used to close the hole on top of the hat and to sew the pom pom onto the hat.
Closing the hole on top of the hat
Turn the hat inside out, thread yarn needle with the long yarn tail and weave yarn through ends of last round; pull the yarn tight to close the hole. Secure by weaving the yarn through for a few more times, then fasten off!
Add a pompom (optional)
Turn the hat on the right side and sew a faux fur pompom on top of the hat. And you're done!Below is a pin for your Pinterest crochet board! Save and enjoy! :)
I hope you enjoy this pattern!
Get more Free Crochet Hat Patterns!
For more free crochet patterns and tutorials, please visit my FREE Crochet Pattern Page!
and also Visit the Homepage!Don't miss out new free crochet patterns, tutorials and other updates from My Hobby is Crochet! SUBSCRIBE to our FREE Newsletter and follow My Hobby is Crochet on Facebook, Pinterest,Instagram and YouTube.

Dreamy Cable Hat
Written Instructions and Pictures COPYRIGHT © Dec.2022 Kinga Erdem.
This pattern is free for your personal use, you can sell the products of your work, a link back to my blog would be appreciated. Do not use my photos for selling purposes or modify them in any way.
Please don't repost the pattern itself to any other sites, but please share the link to the pattern if you want to share the pattern with your friends. You may not give away copies of this pattern.
Do not make video tutorials or translate my pattern in other languages without my written consent!
Thank you.
Kinga


Is there a pdf I can buy without all the ads???
ReplyDeleteHi, I don't sell pdf's. But here is how to print my patterns:
DeleteUsing a PC, take a look at the sharing buttons below the pattern! If you click on the right green sharing button, you will have more sharing options. Between them is "Print Friendly". Click on that and it will transform the pattern into pdf or you can print it out. If you select the unwanted images/text you can delete them and only print what you need.
I hope this helps!
Kinga
hi this is stunning. i cant find the print friendly button please help?
DeleteHi, please see my reply above. If that does not help, you can copy the link to the pattern page and paste it into Print Friendly site here: https://www.printfriendly.com/.
DeleteHi Kinga, I love your Dreamy Cable Hat. It is really beautiful! Thank you for linking up at our weekly Link Party! You are being featured at our Wednesday
ReplyDeleteParty #482 this week. Here’s the direct link to the post in case you’d like to share your feature:
https://oombawkadesigncrochet.com/dreamy-cable-hat-buffalo-plaid-coasters-star-placemat-link-party-482/
Hope to see you again next week! Rhondda
Thank you so much Rhondda! :)
DeleteThis is the best hat pattern! I just finished my third one! Have had great results with Mandala Ombré yarn. Thank you for sharing!
ReplyDeleteThank you for the yarn suggestion. I love using the Mandala Ombre yarn.
DeleteYou're very welcome! I'm so glad you enjoyed the pattern!
DeleteDid you hold the mandala yarn double? Or single?
DeleteDo you have a video tutorial for the cable stitch?
ReplyDeleteSorry, I don't a a video tutorial.
Delete