"Raffie" Sun Hat | Free Crochet Pattern
A Straw Sun Hat crochet design was for a long time on my to-do list.
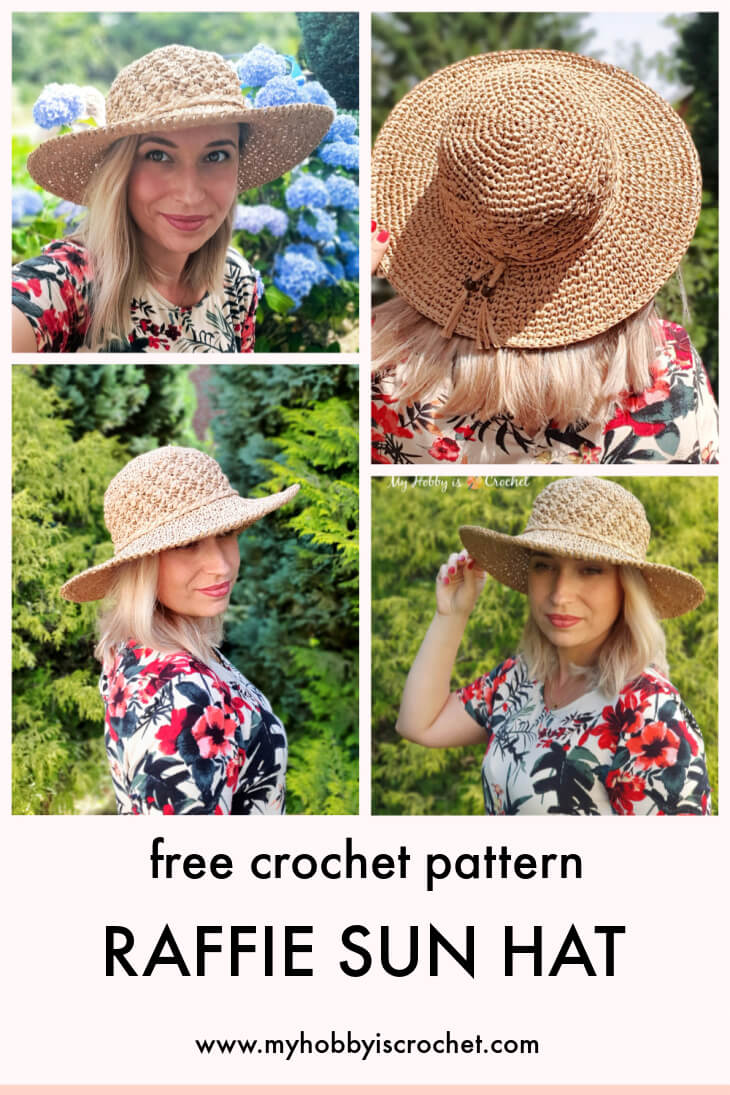
And finally is here: the "Raffie" Sun hat - a straw crochet hat made with Raffia, paper ribbon.
I'm very happy about the way it turned out! My both sisters love it also and they have already asked me to crochet some straw hats for them also! :)

*Disclaimer: This post includes affiliate links and at no additional cost to you, I might earn a small commission if you decide to purchase through these links. Thank you!
Raffie Sun Hat
This crochet straw hat features a large brim and a lovely textured hat bucket. Made of 100% natural paper straw, it is lightweight, breathable and very comfortable to wear.
The wide brim provides a perfect shade to your face, protecting you from the sun. Not only functional, but very stylish, the Raffie Sun Hat will give your outfit an individual, elegant touch.

This straw crochet sun hat is perfect for the beach, but also for gardening and hiking and the best thing is that it's also travel-friendly; you can gently fold it and put it in your bag.
For stability, the stitches are intended to be worked tightly with a smaller hook size as you would normally use for this raffia ribbon.
The wire-edged brim will give even more stability and you can easily bent the brim to shape it whatever you like.
SIZE
Adult Women, Size S/M, 54-56 cm (21"- 22") head circumferenceBrim: 9 cm (3.54 inch) height
GAUGE
6 sts and 6 rounds in single crochet = 5cm x 5cm (2”x2")
SUPPLIES:
• 1 roll of Raffia Paper Craft Ribbon Packing Paper Twine, 1/4 Inch by 218 Yards (200 meters)I have used one complete Raffia roll for the hat without the braided band.
If you make the braided band, you will need a small amount from a second Raffia roll. You can also replace the braided band with a ribbon band/ scarf or a leather band.
• 4.5 mm crochet hook
• 1 stitch marker
• Yarn Needle
• Scissors
• Adhesive tape
• small amount of thread or embroidery floss in same color as the Raffia to secure the braided band to the hat
Optional Supplies
• 2 wooden beads with larger hole to insert the ends of the braided band• galvanized wire rope, 1/16th” thick .
You will need 110 cm (43.5”). I have bought it very cheap from our local hardware store and they cut it for me at the desired length.
If you buy the wire rope online, you will need some wire cutters as well!
CLEANING TIP
Do not wash directly with water, use a damp cloth to wipe, and then dry the straw hat in the sun.
STITCHES, TERMS (US) AND ABBREVIATIONS:
magic ringch: chain
sc: single crochet
hdc: half double crochet
dc: double crochet
slst: slip stitch
group = here: work (1sc, 1 hdc, 1dc) into same stitch
* to * : repeat the sequence of stitches between the stars
sk: skip
(...) x :repeat the sequence in the parentheses the number of time given in the pattern
NOTES
This straw sun hat is started at the top.You will first crochet the crown of the hat as a flat circle worked in spiral rounds, without slip stitching to join at the end of each round.
To keep track of the rounds, place a stitch marker into top of first stitch of the round; move the stitch marker as you go, placing it always into the first stitch of each round.
Once you finish crocheting the crown of the hat, you will work the hat bucket without increases and the rounds will be joined with slip stitch. The joining at the end of the rounds will be made into the top of the first stitch, not into the beginning chain 1.
How to join into round with slip stitch
at the last stitch, remove the loop on the hook; insert hook from back to front into both top loops of the first stitch of the round, catch the loop you removed from the hook and pull it though the stitch from front to back.For the brim there will be some increase rounds made and all the rounds will be joined with slip stitch, the same way as the hat bucket.
HAT INSTRUCTIONS:
Hat Top/ Crown
Round 1: Start with a magic ring.
Ch1, work 6 sc into the ring. Do not join with slip stitch! Continue working the next 10 rounds in a continuous spiral! Do not ch 1 at the beginning of next rounds! Place a stitch marker into the first stitch of the round!
Round 2: 2 sc in each st around ( 12 sts)
Round 3: *1 sc in first st, 2 sc in next st, repeat from * around (18 sts)
Round 4: *1 sc in each of next 2 sts, 2 sc in next st, repeat from * around (24 sts)
Round 5: *1 sc in each of next 3 sts, 2 sc in next st, repeat from * around (30 sts)
Round 6: *1 sc in each of next 4 sts, 2 sc in next st, repeat from * around (36 sts)
Round 7: *1 sc in each of next 5 sts, 2 sc in next st, repeat from * around (42 sts)
Round 8: *1 sc in each of next 6 sts, 2 sc in next st, repeat from * around (48 sts)
Round 9: *1 sc in each of next 7 sts, 2 sc in next st, repeat from * around (54 sts)
Round 10: *1 sc in each of next 8 sts, 2 sc in next st, repeat from * around (60 sts)
Round 11: *1 sc in each of next 9 sts, 2 sc in next st, repeat from * around (66 sts).
Smooth the flat circle out to loosen the stitches a bit up. After smooting the piece a bit out, it should measure approx. 17 cm (6.7”). See the picture below!

Hat Bucket
The hat bucket will be worked without increases and you will work in joined rounds with slip stitch!The stitches tend to tighten up, so you will need to stretch the piece around after each round to loosen up the stitches and kind of block it this way!
Round 1: work 1 sc in each st around, join with slst to top of 1st st!
Remove the stitch marker. You will not need it anymore! From here you'll work in joined rounds with slst to first st of the round.
Round 2: ch1, work (1 sc, 1 hdc, 1 dc) into first sc, sk 2 sc, work *(1 sc, 1 hdc, 1 dc) into next sc, sk 2 sc *, repeat from * to *, slst to top of 1st. sc. ( 22 groups total)
Rounds 3-9: ch 1, work (1 sc, 1 hdc, 1 dc) into first sc, sk next (1 hdc and 1 dc), *work (1 sc, 1 hdc, 1 dc) into next sc, sk next (1 hdc and 1 dc)*, repeat from * to *, slst to top of first sc. ( 22 groups total)
Round 10: ch1, work 1 sc in each st around, slst to top of first sc (66 sts total )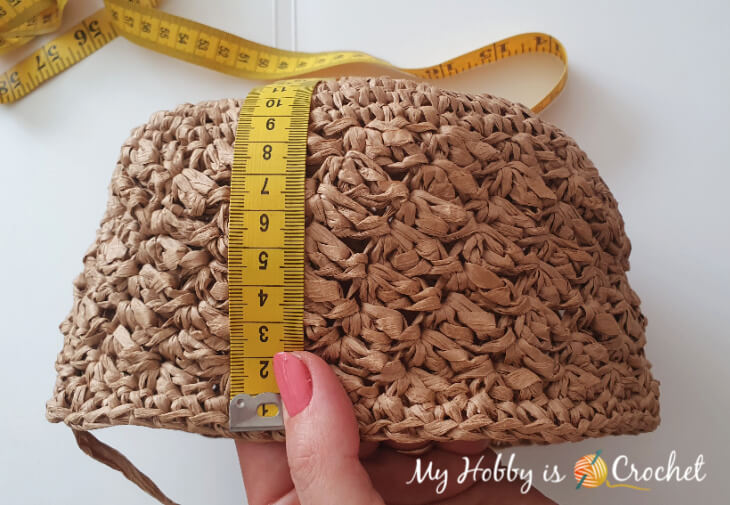
After finishing the hat bucket, you will keep gently stretching it around and mold it/ shape it to fit your own head!
The Brim
Fow the brim you will continue to work in joined rounds, working 6 increase rounds, increasing each time by 11 sts.To avoid a hexagonal shape of the brim, the increases will be placed differently (shifted) in the increase rounds.
After each round of the brim you will stretch it to loosien up the stitches and block it this way.
Round 1 (Increase round): ch1, *work 1 sc in each of the next 5 sts, 2 sc in next st*; repeat from *to* around, slst to top of first sc (77 sts total)
Round 2: ch1, 1 sc in each st around, slst to top of first sc. (77 sts total)
Round 3 (Increase round):: ch1, work 1 sc in each of the next 3 sts, 2 sc in next st, work (1 sc in each of next 6 sts, 2 sc in next st) x 10 times, work 1 sc in each of last 3 sts, slst to top of first sc. (88 sts total)
Round 4 (Increase round): ch1, *work 1 sc in each of the next 7 sts, 2 sc in next st*; repeat from *to* around, slst to top of first sc (99 sts total)
Round 5: ch1, 1 sc in each st around, slst to top of first sc. (99 sts)
Round 6 (Increase round): ch1, work 1 sc in each of the next 4 sts, 2 sc in next st, work (1 sc in each of next 8 sts, 2 sc in next st) x 10 times, work 1 sc in each of last 4 sts, slst to top of first sc. (110 sts total)
Round 7: ch1, 1 sc in each st around, slst to top of first sc. (110 sts)
Round 8 (Increase round): ch1, *work 1 sc in each of the next 9 sts, 2 sc in next st*; repeat from *to* around, slst to top of first sc (121 sts total)
Round 9: ch1, 1 sc in each st around, slst to top of first sc. (121sts)
Round 10 (Increase round): ch1, work 1 sc in each of the next 5 sts, 2 sc in next st, work (1 sc in each of next 10 sts, 2 sc in next st) x 10 times, work 1 sc in each of last 5 sts, slst to top of first sc. (132 sts total)
This is how the hat looks after round 10, just before adding the wire!
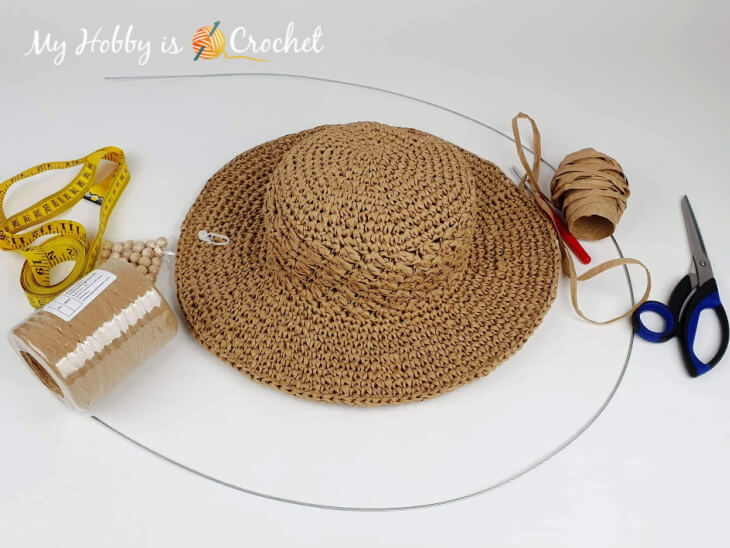
For more stiffness of brim, work the last round of brim (round 11) around the wire rope!
See below how to work around the wire rope!
Round 11: ch1, 1 sc in each st around. At the end of round finish off invisibly. (132 sts)
How to work around the wire rope

Hold the galvanized wire rope along the edge of brim so that the ends overlap themself.
Crochet over the wire (so it is caught inside your stitches) as you sc in each st. After working a few stitches, to make sure that the 2 ends of the wire rope will not pierce through the crochet piece, tape the first overlapped loose end of wire and the wire and crochet over the taped ends. See picture below!
Before you reach the end of round, smooth the brim out so the tension is even all around. Tape the second loose end of wire rope and complete the round by working over the taped ends.
Braided Band with beaded ends
For the braided decorative band, you will use the “3 Strand Braid”, the kind of braid used to braid hair. You will either need some extra pair of hands (my 10 year old helped me hold the ends so I can braid the strands together) or you can pin the ends down while you braid.Cut 3 strands of Raffia, each of them measuring approx. 110 cm (43.5”).
Take a wooden bead with a larger hole and insert one by one an end of each Raffia strands. (Twist the ends to thin them and pass through the bead.)
Pull the bead up the strands, then knot the end in a tight knot, leaving about 5 cm (2 inch) tassel.
Place the bead right after the knot, then braid the 3 strands as if you would braid your hair, smoothing the strands and the braid while you braid.
Before you reach the other end of the strands, try the straw hat on your head with the braided band added just above the brim; tie braid in a double knot at the back of the head.
Add another wooden bead at the other end of the braided band and make a knot after the bead making another tassel.
Trim the edges of the two tassels to the same length.
Secure the braided band in place: thread yarn needle with Raffia or same color thread/ embroidery floss. Stitch the band onto hat just above the brim with a few stitches evenly placed. Cut thread and weave in the loose ends.
And you're done! You can now wear with pride your own handmade stylish straw hat! :)
I hope you enjoy this pattern!
UPDATE 2023: The matching Raffie Crossbody Bag free crochet pattern is available now! What a lovely set they make, don't you think?

For more free crochet patterns and tutorials, please visit my FREE Crochet Pattern Page!
Don't miss out new free crochet patterns, tutorials and other updates from My Hobby is Crochet! SUBSCRIBE to our FREE Newsletter and follow My Hobby is Crochet on Facebook, Pinterest ,Instagram and YouTube.
"Raffie" Sun Hat
Written Instructions and Pictures Copyright © July 2022 Kinga Erdem
This pattern is free for your personal use, you can sell the products of your work (no mass production), a link back to my blog would be appreciated. Do not use my photos for selling purposes or modify them in any way.
Please don't repost the pattern itself to any other sites, but please share the link to the pattern if you want to share the pattern with your friends. You may not give away copies of this pattern.
Do not make video tutorials or translate my pattern in other languages without my written consent!
Thank you,
Kinga


So very cute and stylish, love the crochet stitches you used, thank you for sharing your creative gift with others!
ReplyDeleteYou're very welcome! I'm glad you like it! :)
DeleteThank you for sharing this stylish hat. I love the crochet stitches you used, what a gift you have to design and execute.
ReplyDeleteYou're very welcome! Please enjoy! :)
DeleteLove your pattern! Does raffia paper have an odor? I am very sensitive and have allergies. This appears to be an alternative to straw hats. I hope!
ReplyDeleteI love this hat and am trying to make it right now. I have frogged the top (first part) and reworked it 3 times; but, I cannot figure out how you got 6.7 inches. I've even gone up to a 5.5mm hook, but it's still about a half inch short of the 6.7".
ReplyDeleteMaybe your Raffia band is not as thick as mine? Have you tried stretching the circle a bit out?
DeleteIs there a print option?
ReplyDeleteKinga your Raffie Sun Hat is beautiful ♥ Thank you for linking up at our weekly Link Party! You are being featured at our Wednesday Party #462 this week. Here’s the direct link to the post in case you’d like to share your feature:
ReplyDeletehttps://oombawkadesigncrochet.com/raffie-crochet-sun-hat-woodsy-the-owl-crochet-sunflowers-link-party-462/
Hope to see you again next week! Rhondda
Thank you so much Rhondda! :)
DeleteTo make the head circumference larger for those of us with big heads/ hair?
ReplyDeleteHi, to make it larger, you could add an extra round with increases for the top/ hat crown. That would be round 12 and it will be like this:_*1 sc in each of next 10 sts, 2 sc in next st, repeat from * around (72 sts total). Your overall stitch count will be from now on different as in the pattern indicated. You need to check how it will work out with the increases for the brim. I hope this helps.
DeleteIn spanish please
ReplyDeleteHello, I'm planning on making this hat, but I wondered if you must use galvanized steel wire or can you use Aluminum or any other crafting wires?
ReplyDeleteHi, I have only used this kind of wire, it keeps the shape and it is not so heavy. You could also use plastic millinery wire.
DeleteThanks I made on it seem to bigger than I want , I make other one I use a small hook
DeleteThat one is just like I like the hat to turn out .the first one it is fine . My small look wonderful. I think. And use a wire to
I am going at least 3 more
That's awesome! I'm so glad you enjoy your sun hat! :)
DeleteThanks. Very much I enjoy doing this pattern my first. Is bigger than I figure would be . But ok my 2rd one is right size. I use a small hook. . I got put the wire in yet , do that in the morning. I am make 2 more. For friends. I wish a person could share their. Hats . I would love see other people hats
ReplyDeleteThanks a lot
Joyce
Hi Joyce, you're very welcome! So glad they your hats turned out pretty! I would love to see a picture, if that's possible!
DeleteThanks getting back to me now I am making a red one out red heart yarn
DeleteWhere do I show you my picture. Joyce
DeleteHi Joyce, if you like, you can send me a picture at this email address: kinga at myhobbyiscrochet dot com Thank you! :) Kinga
DeleteI have orders for the sun hats. 4 off than . When I get done with than. . I be sick off the summer hats
DeleteThanks. I don’t change. Any thing for my hats. I give as a gift. To people like afghans and shawls sock caps and etc
DeleteSo very cute. I can see it in several spring colors!! One for my sister. I think she would adore it. Thank u for sharing this lovely pattern.
ReplyDeleteYou're very welcome! Please enjoy! :)
DeleteGreat pattern, instead of wire I have finished the last round using reverse single crochet stitch . It has stiffened the brim and added a nice finished edge.
ReplyDeleteThank you for this pattern, easy to follow and fun to make. I've made a hat for myself and immediately my friend wanted me to crochet one for her! That's a Xmas gift sorted 😃 now my mum wants one too 😆
ReplyDeleteI just started working on this hat, store had a different brand of paper yarn on clearance..seems to be working OK, but it feels more like plastic..my diameter was a row too small, so I just added another one. Just about to start the brim! Will update
ReplyDeleteI can’t wait to make this! I want to make a matching hat for my daughter. But she measures 19-20. How would I adjust the pattern to make it smaller?
ReplyDeleteIt is so hard to work with the rafia!!!
ReplyDeleteDoes anyone have a nice male version hat pattern that would pair nicely with this hat?
ReplyDelete