
Straw beach bags are super trendy in summer! I couldn’t wait to create my own!
I’m super excited to introduce you my latest design, the Alie Beach Bag, a chic and functional straw beach bag/ market bag.
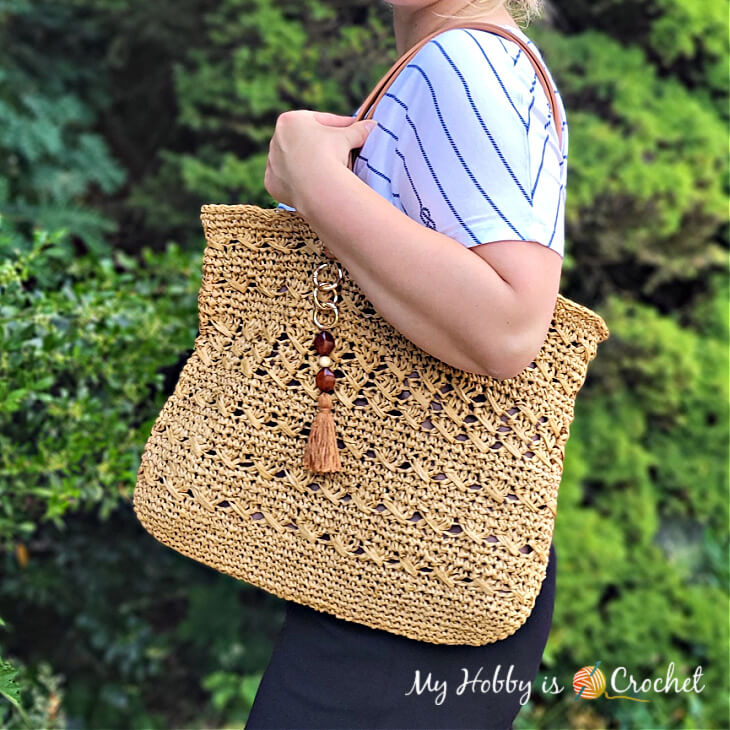
Although it has a generous size to store all your beach essentials, it is lightweight.
It’s now my favorite bag to wear not only at the beach, but everywhere! I hope you will love it as much as I do!
*Disclaimer: This post includes affiliate links and at no additional cost to you, I might earn a small commission if you decide to purchase through these links. Thank you!
This crochet straw bag features beautiful cross-over cables, a cute diy tassel and synthetic leather straps to make it more sturdy!
To make this bag I have used Raffia paper yarn, but you can use other yarns if you prefer. I just love the look of Raffia! It is a bit challenging to work with, but I think that the end result is stunning!

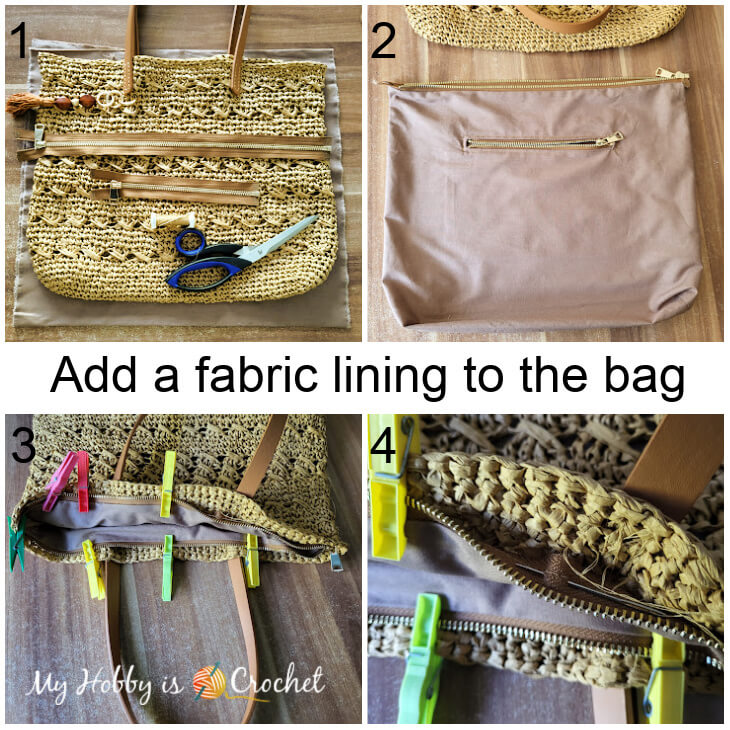
I have lined the bag with fabric, it has a pocket inside and it closes with a zipper. This is optional, of course! You could leave it without a linning, you could even crochet your own handles and instead of the zipper you could use a magnetic button clasp snap, if you like!

SIZE
Width: 15.5 in (40 cm)Height: 13 in (33cm)
GAUGE
6 sts and 7 rounds in single crochet = 5cm x 5cm (2”x2")
SUPPLIES
• 2 rolls of Raffia paper yarn Raffia Paper Craft Ribbon Packing Paper Twine, 1/4 Inch by 218 Yards (200 meters)(From the second skein you will only need about a half.)
• 4.5 mm crochet hook
• 5 mm/H crochet hook
• 1 stitch marker
• Yarn Needle
• Scissors
• Measuring tape
• 2 bag straps
I have used two synthetic leather bag straps that are 2 cm (approx. 0.78 inch) wide and 60cm (approx. 23.62 inches) long.
• Sewing Thread in corresponding color and sewing needle
• Sewing pins
• a bit of paper glue
Optional Supplies
• Fabric for lining (17’’ wide ) Depending if you are sewing a pocket or not and how tall the pocket should be, you will need more or less fabric.If you like, you can add a lining to your bag. You can sew the lining by hand, or with a sewing machine for faster work and a more professional look .
Sewing of lining through the crochet Raffia bag should be done by hand!
• Iron and ironing board (for ironing the lining)
• Zippers:
1 piece of 16 inch (40 cm) zipper (I have used golden metal zippers)
1 piece of 8 inch (20cm) zipper for bag pocket, if you add a lining with a pocket to your bag
• For the charm/pendant I have used 3 beads with larger hole (one small wooden bead and 2 acrylic beads; 3 small snap rings (2cm in diameter) to insert the charm into the bag
STITCHES, TERMS (US) AND ABBREVIATIONS:
ch: chainBack bump of chains (click on the link to open the page with my tutorial) sc: single crochet
hdc: half double crochet
dc: double crochet
* to * : repeat the sequence of stitches between the stars
sk: skip
beg: beginning
Invisible Finish Off: after working the last st of the last round, do not join into round with slst, instead cut yarn leaving a few inches tail; thread yarn needle with the yarn tail, insert the needle from back to front under both tops loops of the 2nd st at beg of round, pull through the stitch, then insert needle between the front and last loop of the last st and pull yarn though. Weave the yarn end in.
Special Stitches:
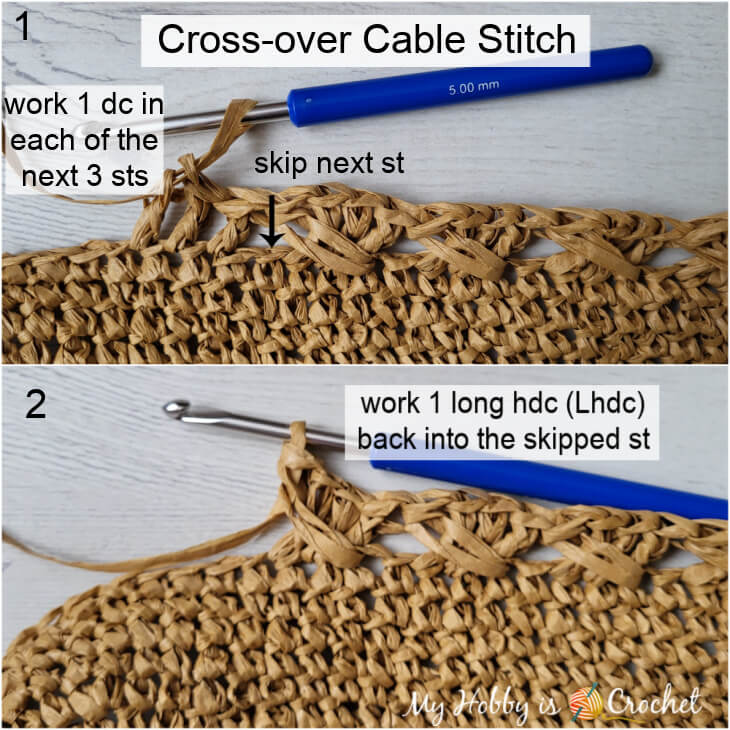
Cross-over Cable Stitch: skip next st, work 1 dc in each of the next 3 sts. Working over the 3 dc’s just made, yarn over and insert hook into skipped st.
Pull up a loop to the height of the dc’s, yarn over and pull through all 3 loops on hook to complete a long half double crochet (Lhdc) !
The 4 sts made will create a cross-over cable.
NOTES
- The bag is started at the bottom and worked in spiral rounds, without slip stitching to join at the end of each round.
- To keep track of the rounds, place a stitch marker into top of first stitch of the round; move the stitch marker as you go, placing it always into the first stitch of each round.
- To join a new skein of Raffia, glue together the ends with a bit of paper glue. Wait a bit to dry then continue crocheting.
CLEANING TIP: Do not wash directly with water, use a damp cloth to wipe, and then dry the bag in the sun.
Alie Beach Bag Bag

BEACH BAG INSTRUCTIONS:
With hook size 4.5 mm start with ch 38. Round 1: Work into the back bumps behind the chains 1sc in 2.nd ch from hook and 1sc in each of the next 35 ch, work 3 sc in last ch; do not turn!
Continue working along the other side of the foundation chain inserting the hook under both unworked loops of the chains (this way you will not have holes at the bottom of your bag!):
1 sc in each of the next 35 sc, 2 sc into 1.st ch at the beg of round.
Do not join with slst! Continue working all the next rounds in spiral rounds without joining with slst! Don’t forget your stitch marker!
(76 sts total)
Round 2: 2 sc in 1st. st, 1 sc in each of next 35 sts, 2 sc in each of the next 3 sts, continue working on the other side of the foundation chains 1 sc in each of next 35 sts, 2 sc in each of next 2 sts. Do not join with slst! (82 sts total)
Round 3: 2 sc in 1st. st, 1 sc in each of next 36 sts,
(2 sc in next st, 1 sc in next st) x 3 times,
1 sc in each of next 35 sts,
(2 sc in next st, 1 sc in next st) x 2 times.
(88 sts total)
Round 4: 1 sc in each of next 2 sts, 2 sc in next st, 1 sc in each of next 37 sts,
(2 sc in next st, 1 sc in each of next 2 sts) x 3 times,
1 sc in each of next 35 sts,
(2 sc in next st, 1 sc in each of next 2 sts) x 2 times.
(94 sts total)
Round 5: 2 sc in 1st. st, 1 sc in each of next 38 sts,
(2 sc in next st, 1 sc in each of next 3 sts) x 3 times, 1 sc in each of next 35 sts,
(2 sc in next st, 1 sc in each of next 3 sts) x 2 times
(100 sts total)
Here is how the bag bottom should look at this point:
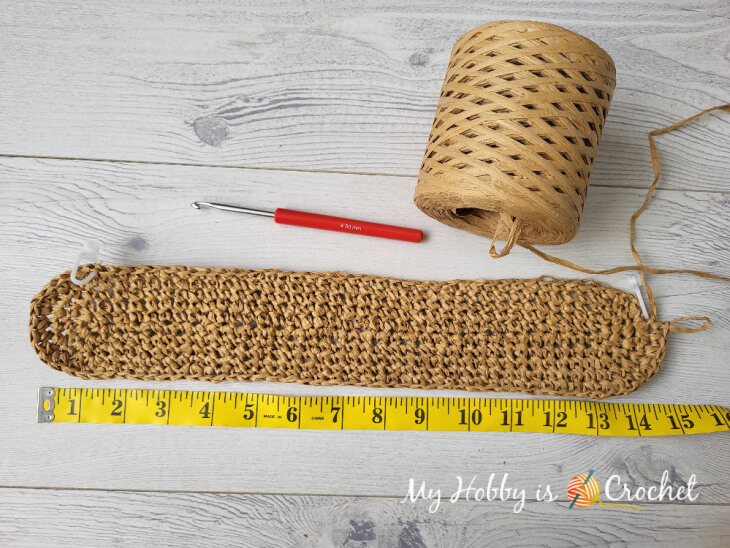
Round 6: 1 sc in each st around (100 sts total)
Rounds 7-9: Change to 5mm crochet hook and work the same as round 3. Continue working with the 5mm crochet hook and continue all the next rounds in spiral, without joining!
Round 10 (Cross-over Cable Round): *sk next sc, 1dc in each of next 3 sc; going in front of the 3 dc just made work 1Lhdc back into skipped sc*, repeat from *to* around. (25 Cross-over Cable sts total)
Rounds 11 - 13: sc in each st around (100 sts total)
Rounds 14 - 21: Repeat the sequence from round 10 to round 13 two times more! (That means one round with the Cross-over Cable and 3 rows with the sc, then again one round with the Cross-over Cable and 3 rounds with the sc)
The next 3 rounds (rounds 22-24) will be made with the cross-over cable-st!Round 22: as round 10 (Cross-over Cable Round)
Rounds 23-24: (Cross-over Cable Rounds): *sk next dc, 1dc in each of next 3 sts; going in front of the 3 dc just made work 1Lhdc back into skipped dc*, repeat from *to* around (25 Cross-over Cable sts total)
Here is a close up of the 3 cable rounds:
Rounds 25 - 27: sc in each st around (100 sts total)
Rounds 28 -35: as Rounds 14 - 21: Repeat the sequence from round 10 to round 13 two times more!
Round 36: work 1 slst in each st around.
(Try to work the sts evenly!)
Fasten off invisibly. Weave in all ends.
Adding the handles
Place first handle centered (having about 5 inches in between the 2 ends of the handle).With a sewing needle and sewing thread, sew the handle to the straw bag with a simple back stitch. To make it sturdy, sew each stitch several times. (3-4 times)

Optional
- Add a charm to the bag, if you like!
I made mine by myself.
Learn how to make your own bag charm/pendant with my Video Tutorial here!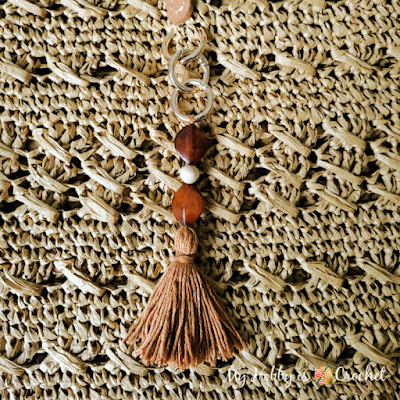
- Add a fabric lining with zipper to the bag. See the video tutorials linked below!

I’m by no means a professional in machine sewing, but I did a pretty good job with the help of some sewing video tutorials on YouTube from KnitcroAddict! This is my second second crochet bag to add a linning! I have even sewn a bag pocket with a zipper inside the bag. Then I have handsewed the lining to the Raffia bag.
Here are the (Video) Tutorials that helped me:
- How to sew a lining into a crochet bag/ how to make a zipper lining (Video Tutorial on YouTube)
- How to make a lining for crochet bag (Video Tutorial that shows how to make the pocket also!)
- How to add a zipper and a lining to a crochet bag ( Picture tutorial by Heart Hook Home)
I hope you enjoy this pattern!
Want more crochet patterns using Raffia? Check out the Raffie Crossbody Bag and the
the matching Raffie Sun Hat!
For more free crochet patterns and tutorials, please visit my FREE Crochet Pattern Page!
Don't miss out new free crochet patterns, tutorials and other updates from My Hobby is Crochet! SUBSCRIBE to our FREE Newsletter and follow My Hobby is Crochet on Facebook, Pinterest ,Instagram and YouTube.
Alie Beach Bag
Written Instructions and Pictures Copyright © June 2023 Kinga Erdem
This pattern is free for your personal use, you can sell the products of your work (no mass production), a link back to my blog would be appreciated. Do not use my photos for selling purposes or modify them in any way.
Please don't repost the pattern itself to any other sites, but please share the link to the pattern if you want to share the pattern with your friends. You may not give away copies of this pattern.
Do not make video tutorials or translate my pattern in other languages without my written consent!
Thank you,
Kinga

No comments:
Post a Comment